Showing posts with label farmer's market. Show all posts

9.20.2014

Summer Cucumber Salad


This cucumber salad is so perfect--cool, refreshing, satisfying, and really easy. It's especially good when made with the pickling cucumbers from summer farmer's markets!

Cucumber Salad
  • 4 cucumbers, peeled and sliced as thinly as you can
  • 1 small yellow onion, minced
  • 3/4 cup sugar
  • 1/2 cup water
  • 1 cup white vinegar
  • 1/2 tbs dried dill

Boil the sugar, water, white vinegar in dill. Mix together the cucumber slices and onion; once the vinegar/sugar/water mix is boiling, pour it over the cucumber slices and onion mixture. Let it sit in the fridge for a day before eating (if you can resist). It is good after the first day but continues to get better--I often end up doubling the recipe to let it last a week!


9.19.2012

Apple Crostata


When I walked out of my house this morning, the cold air shocked me. It was only in the forties, but for the first time this year, it truly felt like fall. The dry air whispered through the dying leaves, promising that fall is truly beginning.


I used to have a strong dislike for apple pie, but as I have grown older, I have separated apple pie into two categories: mushy, too-sweet "diner" pie and tart, lemony, cinnamon-y apple pie with a perfectly flaky crust. I still hate the former, but I have a growing appreciation for the latter. That said, pie is a lot of work. My roommate will spend the afternoon making a pie crust by hand, shaping a beautiful and perfect pie--she has the patience for this and her pies are DELICIOUS.

I was inspired by her pies, but wanted to do something a little less, well, time consuming.  I was inspired by the tomato and goat cheese crostata I made a few weeks ago, and made up a little recipe for an apple crostata.  The crust is actually the same as for the goat cheese crostata (inspired by Jack Bishop), but without the rosemary and with a little cloves or nutmeg added (some apple pie spice--choose your favorite and throw in a pinch!). With the food processor, the dough took 5 minutes to make and only an hour to chill.


Apple Crostata

For the crust:

  • 1 1/4 cups unbleached all-purpose flour
  • 1/2 tsp salt
  • 8 tbsp (1 stick) chilled unsalted butter, cut into 8 pieces
  • 4-5 tbsp ice water


Place the flour, salt, and rosemary in a food processor and pulse several times to combine. Add the butter and pulse until the mixture resembles pea-sized crumbs, about ten 1-second pulses.

Add the water, 1 tbs at a time, and pulse briefly after each addition. After 4 tbs of water have been added, process the dough for several seconds to see if it will come together. If not, add the remaining 1 tbs water. Process just until the dough comes together in a rough ball. (Bishop says: "Do not overprocess or the dough will not be flakey"). Transfer the dough to a lightly-floured work surface and knead briefly to for a smooth ball. Flatten the dough into a 5-inch disk and wrap it in plastic wrap. Refrigerate the dough for at least 1 hour and up to 2 days.


While the dough was chilling, I sliced 4-5 apples very, very thinly and tossed them in lemon juice (2-3 tbs or more to taste!), the zest of 1 lemon, cinnamon (1-2 tsp), as well as a pinch of nutmeg and allspice. I let them sit in this "dressing" until the dough came out of the fridge.

Roll out the crust, and arrange the apples in circles, slightly overlapping them. Fold the edges of the crust over the outer circle of apples and pinch together any parts that are open. Sprinkle with a little bit of cinnamon. Bake at 375º for 30-40 minutes.


8.26.2012

Italian Plum Cake


During any type of orientation, you are guaranteed to be asked: "Please share one unique thing about yourself". In a lunch meeting with a group of students and my academic advisory dean, I said I liked to cook and bake, especially when stressed out.

My dean laughed, saying, "You just made a bunch of new friends".  All week, I thought what to bring in to our next lunch meeting. When I saw the plump little prune plums at the Public Market last Saturday, I knew just what to do.

This has always been a favorite cake of mine, and since it's so seasonal (as far as I know, prune plums are only available in the fall)---it always feels like a rare and delicious treat. The otherwise too-tart plums bake up golden and sweet, perfectly complimented by the vanilla cake below them. The recipe is a hand-me-down from a family friend, one my mom made only once or twice every year....


I brought in the cake to the next meeting of our advisory group, and it sat, awkwardly, in the middle of the table as we discussed topics about the upcoming year. "Does anyone have any other concerns?" my dean asked after a while. When silence ensued, he said, "Well, my concern is how we're going to divide up this cake!"

The cake was as good as I always remember it to be. It is beautiful and delicious, tart and sweet. A friend of mine who claims to have lost his sweet tooth as a teenager ate two whole pieces. It seemed to prompt my advisor's comment: "Maybe you chose the wrong career." While I'm not giving up medical school any time soon, I will continue to bake as much as I possibly can.

Italian Plum Cake
  • 1/2 c (1 stick) unsalted butter, softened
  • 3/4 c sugar
  • 1 tsp vanilla
  • 2 eggs
  • 1 c flour
  • 1 tsp baking powder
  • about 12 prune plums, halved
  • 1 tsp cinnamon mixed with about 1/4 c sugar

Preheat oven to 350º. Cream the butter in sugar in a large bowl. In a separate bowl, mix together the other dry ingredients. Add the eggs to the butter and sugar, and beat in the vanilla. Add the dry ingredients to the wet one, and combine. 

Pour the batter into a well-greased 9" springform pan (a pie plate works as well--though I'll usually put a circle of parchment paper down before I grease the whole thing). Arrange the prune plums out (skin side down) in concentric circles, not overlapping, on top of the batter. Sprinkle the cinnamon-sugar over the top, and bake for 30-40 minutes.


**These pictures are not from the cake I made for my advisor (there was not even one crumb left from that version), but from a version I made this summer with a slightly different (non-dairy) cake bottom. If you are dairy-free, you can substitute this cake base for another recipe, but the batter I made this summer didn't hold up the plums as well as the version with butter. However, if your cake looks a little different, that's why!

8.12.2012

Tomato and Goat Cheese Crostata with Rosemary Crust


Having just moved thirty minutes away from my grandparents, I now have an endless supply of tomatoes.  My grandfather loves to give away tomatoes---every time I leave the house: "Here, take a few tomatoes!!"

The tomatoes had started to build up, and I wanted to use them in something that would really showcase their flavor. I was looking through one of my favorite cookbooks, Jack Bishop's A Year in a Vegetarian Kitchen, when I came across a recipe for a tomato and goat cheese tart. He called for a tart pan with a removable bottom, which I don't have, so I simply made a crostata!


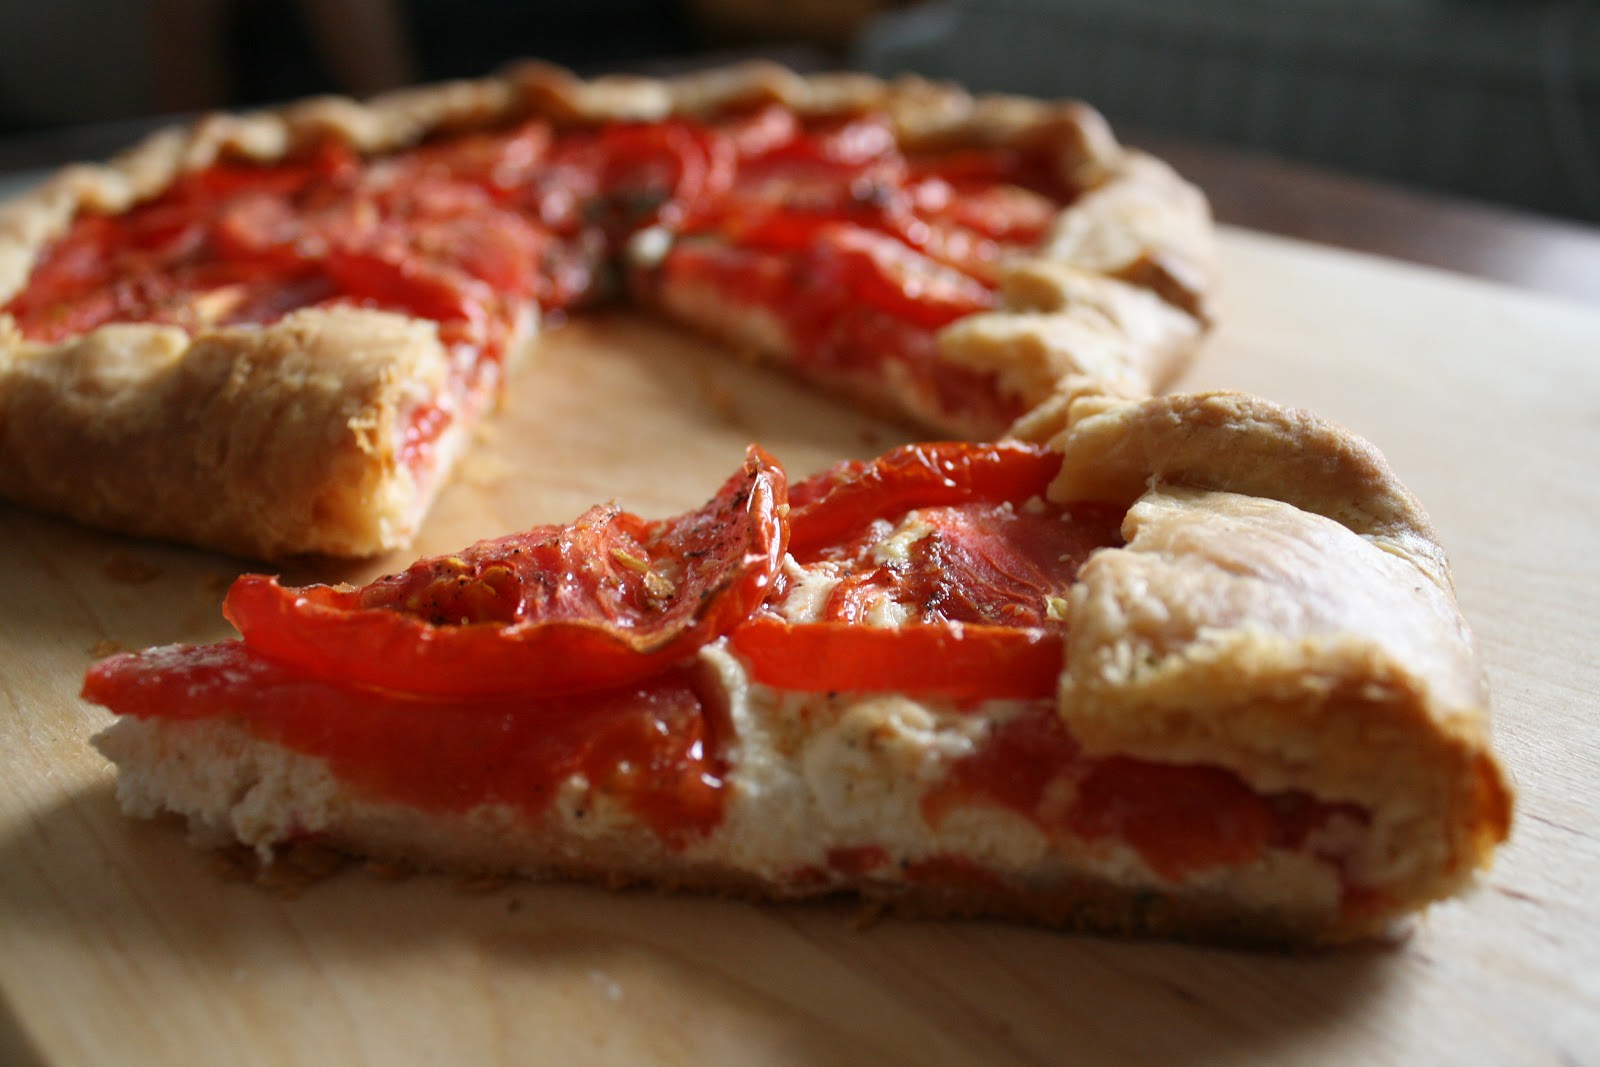
This is definitely in the top three things I've ever made, possibly the best. It turned out beautifully, with a perfectly flaky and golden-brown crust.


Tomato and Goat Cheese Crostata with Rosemary Crust

Crust

  • 1-1/4 cups unbleached all-purpose flour
  • 1/2 tsp salt
  • 1/2 tsp minced fresh rosemary
  • 8 tbsp (1 stick) chilled unsalted butter, cut into 8 pieces
  • 4-5 tbsp ice water

Filling

  • 6 oz fresh goat cheese, crumbled (about 1-1/3 cups)
  • 3 medium tomatoes, cored, sliced crosswise 1/4-inch thick, and blotted dry between paper towels (this keeps them drier so as not to make the crust soggy)
  • 1 tbsp extra-virgin olive oil
  • salt and freshly ground black pepper


A few hours before you want to make the crostata, you need to prepare the dough. While it can be done by hand, it takes five minutes in the food processor. Place the flour, salt, and rosemary in a food processor and pulse several times to combine. Add the butter and pulse until the mixture resembles pea-sized crumbs, about ten 1-second pulses.

Add the water, 1 tbs at a time, and pulse briefly after each addition. After 4 tbs of water have been added, process the dough for several seconds to see if it will come together. If not, add the remaining 1 tbs water. Process just until the dough comes together in a rough ball. (Bishop says: "Do not overprocess or the dough will not be flakey"). Transfer the dough to a lightly-floured work surface and knead briefly to for a smooth ball. Flatten the dough into a 5-inch disk and wrap it in plastic wrap. Refrigerate the dough for at least 1 hour and up to 2 days.

Move an oven rack to the middle position and heat oven to 375°.

To make the crostata, unwrap the chilled dough and roll it into a 12-inch circle on a lightly floured surface. It doesn't have to be a perfect circle, especially if you are using a rectangular baking sheet. Cover a baking sheet with parchment paper, and lay the dough flat on top. Prick the bottom of the tart shell all over with a fork.

To fill the crostata, scatter the goat cheese evenly across the bottom, leaving about one or two inches around the edge of the circle. Arrange the tomatoes over the cheese in two rings (again, leaving the space around the outside of the filling): one around the outside edge another in the center, overlapping them slightly. Drizzle the tomatoes with the olive oil and sprinkle with salt and pepper to taste.  Fold the extra inch or so of tart dough over the tomatoes and pinch together any pieces that don't come together well. Add a sprig of rosemary in the center for garnish.


Bake until the edges of the crostata are golden brown, 45 to 50 minutes. Cool the crostata on a wire rack for at least 10 minutes, then transfer to a cutting board to serve. Cut the crostata into wedges and serve immediately or at room temperature.


8.10.2012

Cooking Locally: Reflections on the Farmer's Market in July

I could swoon and moon over some new recipe, but today is devoted to the stars of the show--the fruits and veggies themselves.

To cook locally is a wonderful thing, if you can find a way. My former co-op did it this way, my mom does it this, and now in my new home, I try to do this. It can be both frustrating (SO. MANY. ZUCCHINI.) and liberating (learning to like eggplant, which I recently did). Overall though, local food just tastes better. And those super-sweet, tiny tomatoes? Some varieties just don't travel well, so they aren't sold in big supermarkets.


Everyone has their own way of doing it, but here's one way:

1.) Save your vegetable and fruit shopping until the morning or afternoon for the market, if you have a big enough one (if they carry it, get your eggs/milk/cheese/meat there too).
2.) Walk around the market, and pick out what looks best to you, keeping in mind different ideas for recipes. If you have a particular one in mind, get stuff for that--in my experience, it's easier to figure meals out later and just get what looks good. Get enough veggies for the week (or if you are a lucky duck and have a 2x/week market get enough for only half of it).
3.) Try and spread out your purchases between things that will last the week (potatoes, beans, apples, onions) and things that have to be eaten more quickly (tomatoes, lettuce, basil)
4.) Let the food inspire you....but here are some ideas below.


Eggplant: Roasted, or on pizza, or in pasta sauce....yum!

Tiny, beautiful eggplants!!

Apples: just for eating, in beet-carrot salad, in a pie, etc.

 Tomatoes: I cannot get enough tomatoes. Plain with salt and olive oil (add basil and fresh mozzarella and you've got a caprese salad!), gazpacho, roasted, fresh salsa, fried green tomatoes and so, so much more (okay, okay I don't have recipes for all these yet).

It's so nice to keep flowers in the house! I love these sunflowers... 


Cucumbers: gazpacho, just eaten for kicks because they're delicious and refreshing, raita, or make your own pickles! (My aunt does this and they're amazing--and when the jar is finished she puts more cucumbers in and voilà, more pickles. I made them with her when I was 3, but clearly I have to learn again...)

Beans: steam them, put them in a Niçoise salad (a favorite of mine), etc.

Peaches: Oh, peaches. Peach cobbler, peach pie, peach sorbet, peach muffins, peach scones, or just as they are. Nothing better.

Can't have too many flowers!


Or tomatoes for that matter. 

Carrots: carrot and beet salad, as is, in stir fry, (in the fall, ginger-carrot soup), and much more.

Beets: carrot beet salad, roasted, borscht (any kind of chilled beet soup is really good in the summer, and an alternative to gazpacho)

 Oh, tomatoes.

 Artichokes: steamed with lemon butter, they are so good!

And these are just only just a few possibilities for a small list of fruits and veggies in one month out of the year. In the fall and winter? Kale, sweet potatoes, chard, collards, butternut squash, acorn squash, apples and so much more.

5.20.2012

Mulberry Peach Cobbler


So, I graduated from college one week ago today.  It's still completely surreal, but the feeling of summer is starting to seep in, one strawberry at a time.


***

In this age of ever-present technological devices equipped with the ability to just "Google it", there seems to be little exploring to do.  Once upon a time, finding "the nearest coffee shop" or a "café with local food for lunch" had the potential to be a whole adventure...it always seems as though you can find anything you would ever need by just looking it up on the internet.

That is, except mulberry trees.  While driving the other day, I saw the familiar sight of a black and purple splotched sidewalk below a leafy tree laden with mulberries. I would have stopped the car to pick a few, but I was on my way home and the tree was in someone's yard. Where, I thought to myself, are other good mulberry trees in Durham? I laughed when I realized that this, if anything, was certainly not Google-able.

When I went to the farmer's market with my mother this morning, there was a big mulberry tree, ripe with fruit, hanging over the path from the parking lot down to the market.


After our shopping (and a delicious strawberry crostada from Scratch bakery), we stopped by to pick mulberries.

***

One of my favorite things to do in the summer is to make cobblers. They are so, so unbelievably easy that they can be an almost instant desert. They highlight whatever fruit is in season at the market (or can be made in the middle of winter with a bag of frozen fruit for a nostalgic trip back to June).

At the market this morning, we bought fresh NC peaches in addition to many other gorgeous veggies that I can't wait to cook this week.


A cobbler is really only 4 steps.


  1. Preheat oven to 375º.
  2. Cut up fruit (in this case, 4-5 smallish peaches and then just throw in a cup or so of mulberries) and toss with juice of 1 lemon and a handful of brown sugar (maybe 1/3 c?).
  3. Sprinkle oats and brown sugar on top.
  4. Bake for 30-40 minutes.
Serve warm, maybe even with vanilla ice cream on top.


2.17.2012

These flowers remind me of home.....

It's cold, rainy, drizzly February still, despite the unusually warm winter. I can't wait to see the flowers. These are hydrangeas from last summer's market in Durham, NC. 


"There are always flowers for those who want to see them"--Henri Matisse

2.09.2012

White Bean and Collard Soup with a Tomato-Balsamic Base


My mom used to make this dish for me all the time when I was little, and with over a pound of fresh collard greens on hand, I decided it was my time to try it. 
About six months ago, I discovered a wonderful little antique store on the way up to visit my grandparents in Rochester, NY (also where I will be attending med school next year!). I bought a cast iron Dutch oven for $25, as well as a set of three vintage pyrex cinderella bowls and a beautiful vintage pyrex loaf pan.
In the past several years, my mom has transitioned from making the dish in her own cast iron Dutch oven to cooking in her all-purpose enamel coated Le Creuset. Somehow, the flavor is slightly different with the enamel coating. When I made the dish in my cast iron Dutch oven, it took on the same delicious tastes that I remembered from my childhood. While this can be made in any kind of pot, I wholly recommend trying it in a cast iron Dutch oven!


White Bean and Collard Soup with a Tomato-Balsamic Base
  • I tbs extra-virgin olive oil
  • 1 large onion, peeled and diced
  • 6-8 cloves of garlic, peeled and chopped
  • 3/4 lb. collards, washed and chopped coarsely
  • 1 tsp salt, or to taste
  • 2 tbs balsamic vinegar, or to taste
  • 1 28 oz. can chopped tomatoes
  •  2 cans cannellini beans, rinsed and drained
  • 4-6 cups chicken or vegetable broth
  • 1/2-1 tsp. thyme
  • 1 bay leaf


In a large dutch oven, saute the onion and garlic in olive oil.  When they are golden, add the greens and sauté until wilted and coated with the oil.  Then add the tomatoes, beans, broth, vinegar, bay leaf and thyme. 
Simmer, covered, for about 3/4 hour, then another 1/2 hour uncovered, making sure that the beans don’t dry out. Continue cooking until beans are creamy and soft, and flavors are melded. When  you remove from the heat, season with  salt to taste, pepper and balsamic vinegar.


2.05.2012

Roasted Brussels Sprouts


I cannot overemphasize the perfection of roasted vegetables.  Plucked straight from the stalk and cut in half, I roasted these at a high temperature (350º-400º) with olive oil and salt.  They went perfectly with the French Onion Soup and fresh bread (recipe to come).

1.31.2012

Apple Cinnamon-Cardamom Scones

This recipe is an adaptation of brilliant vegan chef Isa Chandra Moskowitz's Chocolate Ginger Scones.


The chocolate ginger scone recipe is amazing--one of my favorite go-to brunch recipes.  Last Sunday, just as I began to take out the ingredients for the scones, I realized that we had no chocolate or ginger. After a short moment of panic when I considered skipping the scone-making, I decided to adapt. Assessing the options, I chopped up some apples and grabbed some cardamom and cinnamon from the near-empty spice cabinet.


These three flavors were a perfect wintery brunch combo, eaten side by side with (or dunked into) hot cider from the farmer's market.


The amounts could be played with, but the texture of these scones is always perfectly light and fluffy (2 tablespoons of baking powder will do that I guess). The best part? Total cooking time is half an hour or less!
  • 3 cups flour
  • 2 tablespoons baking powder
  • 2 1/2 teaspoons cinnamon
  • 1 1/2 teaspoons cardamom
  • pinch allspice (or cloves, or both)
  • 1/2 cup sugar, plus extra for sprinkling
  • 1/2 teaspoon salt
  • 1/3 cup vegetable oil
  • 1 1/4 cups non-dairy milk
  • 1 teaspoon pure vanilla extract
  • 1-2 apples, chopped into small pieces
Throw the dry ingredients together in a bowl. Mix together the wet ingredients, then add them to the dry ingredients.  Toss in the apples and mix until just combined. Form scones on a greased baking sheet (an ice cream scoop does this well), sprinkle sugar on top of each scone and bake at 400º for about 15 minutes.

1.28.2012

Peach Sorbet!

Nostalgia for the summer months is setting in.  Rain drizzling outside, lingering patches of snow in the shadows.  I wrote this piece last summer, but never posted it.  Perhaps these dreary days are a time to do so....


This summer was a summer for peaches.  A North Carolina peach farm began selling at our market, and naturally we began to buy peaches each week.  First a small container, then three each week.  We would joke and laugh with the farmers: "Three more please!"


One sunny Saturday, the farmer's daughter said to me, "Y'all are our favorite customers.  If you buy a flat, I'll give you a deal".  Six peaches came out to around $5, but she gave me the flat for $9.


Peach Sorbet
Peel and pit 5-6 peaches. Puree flesh with 1/2 cup cold water, 1 cup minus 1 tbs sugar, 2 tbs lemon juice, and 1 tbs vodka (I used Citron Absolut for one batch—the flavor was perfect, and then for the next I also added a drop of Grand Marnier).  Pour the liquid mixture into an ice cream maker and let the machine do its job!
…if you are a curious scientist in the kitchen, you may ask, “Why the alcohol? ” Vodka is added to lower the freezing point of the sorbet, so that when you put it in the freezer, the water doesn’t become completely solid—this gives the sorbet a lovely, scoop-able, and smooth texture.


7.13.2011

Garden-Grown Panzanella


Panzanella is an Italian bread salad coming from the Florentine region.  Perfect for a summer palate, its ingredients can range from the simple ones I have listed below to more complex versions with capers, peppers, and red onions.
I decided to make panzanella today after looking in the bread box, where a third of a stale French Country loaf sat, leftover from Saturday’s market.  It was stale, but not moldy; I chopped it up into cubes for the salad.  The tomatoes were the “ugly” tomatoes I bought at the market today (as were the cucumbers). The basil is from the garden (mother plant seen behind the salad!).  I made up the recipe, using elements from Ina Garten and an old recipe from Gourmet.  I didn’t have a lot of the ingredients, so I substituted where I could.
Panzanella
  • Stale bread (I used about a third of a loaf of Country French, chopped into half-inch cubes)
  • Heirloom tomatoes (or any big, juicy, flavorful tomatoes), diced in big pieces
  • Cucumbers, chopped into small pieces
  • Basil, either torn or chopped up
  • Olive oil (the better the olive oil, the better the salad—the flavor of the oil really comes through)
  • Red wine vinegar (I had about three drops left, so I put those in and then a bit of white wine vinegar)
  • Salt and black pepper, to taste.
Sauté the bread pieces in a pan with a little bit of the olive oil and salt on medium heat until they are toasted and have soaked up some of the oil (I did this for about 5 minutes). Combine the bread with the tomatoes, cucumber, and basil; mix up the oil and vinegar dressing and pour it over the salad.  The dressing should be mostly oil, with a few dashes of vinegar.  It should have enough oil to soak into the bread without making it soggy (it depends on how stale the bread is).  Let the salad sit until the flavors are all together, about 45 minutes.

11.02.2010

Acorn Sqush Stuffed with Quinoa Pilaf and Smoked Tempeh


When you get all your vegetables at the farmer's market, fall is a time for squash, squash and more squash. Roasted or in pasta (as last week), mashed with nutmeg, maple syrup, lemon juice and sweet potatoes, there are infinite possibilities.


The idea for the following recipe came from my mom--I asked her for the recipe (as I remembered the dish she made so well), but she had no memory of making it. Together we tried to make it up again, and it turned out quite well.


My lovely cooking partner made smoked tempeh (marinated in liquid smoke, I think soy sauce and some garlic...I'll have to ask for the recipe!)--it was the best tempeh I ever had.

Roasted Acorn Squash Stuffed with Quinoa Pilaf


  • Acorn squash (1/2-1 squash per person, depending on size of squash)
  • Quinoa (again, however much you want to make...)
  • Onions (1 small-1 large)
  • Apples (1-2 medium)
  • Walnuts, chopped (a few tablespoons)
  • Raisins (~1/4 c--again, this is to taste)
  • 1 tbs cinnamon (I did this to taste...)
  • 2 tsp cumin (to taste) 
For the squash
Cut squash in half vertically. Scoop out the seeds, and place cut side down on a lightly oiled piece of parchment paper or aluminum foil on a baking sheet. Bake squash for ~30-35 minutes at 350º (until tender--I use a fork to check).


For the quinoa pilaf


In a pan, sauté onions in olive oil. Once the onions are tender, clear and browning, add apples and cook until beginning to soften. Add cinnamon, cumin, and walnuts. Add a tiny amount of oil as well as the onion, nut, raisin mixture to pot (where you will cook quinoa) and sauté quinoa grains (you can add more spices here if you like). Add water to quinoa, bring back to boil and then turn down heat and cover pot. Let quinoa steam for recommended cooking time (17 min I believe). 5 minutes before done, add apples. (I sauteed mine with the onions, and they steamed so long with the quinoa they came out a little mushy--this should work I think). Add any more cumin/cinnamon to pilaf, depending on how much flavor you want.


Stuff quinoa into acorn squash, sprinkle with cinnamon and put back in the oven to warm just before serving.

The extra quinoa pilaf makes for great leftovers!

10.19.2010

Triumph over Butternut Squash, thanks to Mark Bittman

In early September, I drove through Upstate New York to visit my grandparents. On the way home, I spotted a roadside stand filled with gorgeous butternut squash.
 
Roadside stands are rare these days, especially those of this genre--an "honor code" stand. There is a small box for money, and the squash just sitting there for the taking. The large squash (HUGE in my opinion) were $1 apiece and the small (regular sized) were just 50¢ each. (At Trader Joe's the other day, one of these was $1.99). I scrounged around in my car for change, and bought seven for $3.50.


My first project was a simple roasted squash, cut in half and placed on aluminum foil with a tiny bit of olive oil. I baked them at ~400º (I think, or maybe it was 350?) for ~30-40 min, until they were tender and soft.


I still had 5 squash, and needed another meal. I looked up "Mark Bittman butternut squash" on Google--always trusting my favorite NYTimes food writer.


Unfortunately, I attempted this without a Cuisinart. Butternut squash is hard to chop, so be warned--this took forever! The result was delicious, but grating the squash by hand nearly defeated me....


This pasta is amazing. However, it is sweet, so I served it with salty garlic sauteed chard (and a tarte tatin for dessert!)

Butternut Squash Penne

adapted from Mark Bittman


Mark says: "Some butternut squashes are sweeter than others, and there's no way to predict this by appearance. Since this sauce relies on sweetness for its character, if the squash seems a little bland, add about a teaspoon of sugar. It will brighten the flavor considerably".
  •     Butternut squash (peeled and seeded--start with 1 per pound of pasta)
  •     Salt to taste
  •     Olive oil (~2 tbs.)
  •     Black pepper to taste
  •     1 pound cut pasta (I used penne)
  •     1/8 teaspoon freshly grated nutmeg, or to taste
  •     1 teaspoon sugar (optional)
  •     1/2 cup freshly grated Parmesan (I left this out to make it vegan, leaving some on the table for those who wanted to sprinkle some on top)
Cut squash into chunks, and place in food processor. Pulse machine on and off until squash looks grated. (Bittman says you can also do this grating by hand....this is way too difficult. Attempt only if you have a lot of time or patience!)


Set a large pot of water to boil for the pasta.


Place a large skillet over medium heat, and add the butter or oil. A minute later, add the squash, salt, pepper and about 1/2 cup of water. Cook over medium heat, stirring occasionally. Add water, about 1/4 cup at a time, as the mixture dries out, being careful not to make it soupy. When the squash begins to disintegrate, after about 10 or 15 minutes, begin cooking the pasta. While it cooks, season the squash with the nutmeg, sugar if necessary, and additional salt and pepper if needed.


Cook pasta al dente.


Toss pasta with squash. Taste, and adjust the salt, pepper or nutmeg as you like; then, toss with the cheese and serve.


**There is something to be said for good pasta. If you can, go to a specialty foods store and get a pound or two of really good pasta for an amazing upgrade.....


Update: I had a brilliant idea a few weeks ago when I made this. After doing everything as above, I put the pasta in a lasagna pan, covered it with parmesan cheese, and baked it in a 350º oven for 20 minutes or so until the top of the pasta was crunchy.